Qvidian for Web

Qvidian for Web is easy to use, offering a similar experience to functionality already available in Qvidian for Office, such as searching for and consuming content. Qvidian for Weballows you to:

  • Find and consume your content quickly and easily on various RFP portals, websites, and web-based tools, such as Google Docs, Sheets, and Slides.
  • Quickly access and download content stored in Qvidian.
  • Quickly copy answers and paste as needed.
  • Focus your search using Folders and Filters.
  • Find the right content with Suggested Filters.
  • Easily see content preview or details.
  • Read and leave feedback on content.

Once loaded, Qvidian for Web, which operates in a separate window, interacts with web pages to add a context menu option, allowing you to search Qvidian with your selected text.

Tip: To watch the Qvidian for Web video, please see Videos.

  • Finding Content: Click a button at the top right of Qvidian for Web to grab the selected text on the page and run your search.
    • Select folders and filters to constrain your search. Qvidian offers suggested filters to recommend ways to filter your search results based on Custom Metadata applied to the content found in your search results.
    • Preview content, view details, or view and leave feedback on content.
  • Using Content: Once you find the content you’re looking for, you can:
    • Click the “Copy Text” button to copy the HTML Preview for any text that Qvidian can generate an HTML Preview. Pasting into a Rich Text control will preserve most formatting and graphics. Pasting into a regular text box will use the plain text.
    • Note: Pasting into a Rich Text control will preserve most formatting and graphics. Pasting into a regular text box will use the plain text.

    • Download any desired content, including PowerPoint files.
    • Copy a portion of selected text from the HTML Preview.

Installing Qvidian for Web

Qvidian for Web is available from the following stores:

In each case, there is a version for EU hosting and a version for US hosting.

Accessing Qvidian for Web

Note: The following application permissions must be enabled to access Qvidian for Web: "Allow user to log into Qvidian for Web".

  1. After installation, click the Extensions icon and select the Qvidian for Web.
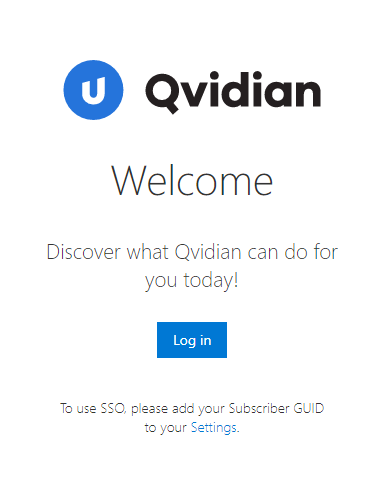
  2. The "Upland Qvidian Welcome" sidebar will appear.
  3. Upland Qvidian Welcome panel

    Tip: You may want to move the sidebar to another screen or re-size the browser window so you can see both items on the same screen.

  4. Click Log in on the "Upland Qvidian Welcome" sidebar. The "Upland Qvidian Log In" dialog appears.
  5. Enter your Upland Qvidian User Name and Password and click Log In.

Searching in the Qvidian for Web

Searching in Qvidian for Web is similar to performing a Library search, but not quite as robust:

  • It only allows searching on the following most relevant fields: Title, Keywords, Learned Terms, Content Text. This excludes Content ID, Contact Info, Comments, and Alert Text.
  • It does not allow “match all” searching.
  • It does not use Boolean operators (AND, OR, NOT).
  • It does not provide all of the filter options available in the Library.
  • It does allow you to download searched content.

Inserting Content

  1. After completing a search, the top content results appear in the Qvidian for Web Results tab, sorted by relevance.
  2. Hover over the results to display the Copy Text icon.
  3. Click Copy Text to copy the desired text results into your clipboard. If you only need a portion of the answer, you can copy selected text from the HTML Preview.
  4. Paste the copied text into your desired location. Pasting into a Rich Text control will preserve most formatting and graphics. Pasting into a regular text box will use the plain text.
  5. Caution: For security reasons, the browsers don’t allow web pages to write content to the clipboard if the user didn’t instigate the action; if this occurs a Continue? button will appear to finish the copy process.

Using Content

  1. After completing a search, the top content results appear in the Qvidian for Web Results tab, sorted by relevance.
  2. Click the More More menu icon on a search result to display the following menu options: 
    • Preview: Click to open a dialog that displays an HTML preview of the content record. You can also select and copy text from the preview window, which Qvidian will record as content usage.
    • Preview dialog

      Tip: If you only need a portion of the answer, you can copy selected text from the HTML Preview.

      Caution: If you attempt to preview (and copy) a piece of Library content with an alert enabled, the alert message dialog will appear prior to your action.

    • View Details: Click to open a dialog that displays the content record's metadata (e.g. Content ID, Date Created, Date Last Modified, Times Used, etc.). You can also select and copy and/or drag and drop text from Details.
    • View Details dialog

    • Download: Download any desired content.
    • Feedback: Add feedback on content records and reply to existing feedback. This allows you to direct questions and concerns about content records directly to their associated content owners. This is not for providing feedback related to specific responses or Projects. Feedback submitted here is tied to the content record itself, without any greater context.
    • Note: You must have the "Use Product Feedback" permission enabled to use this feature.

      • Search: To search through existing feedback, enter text into the Search Feedback field and click the Search Search icon icon or Enter.
      • Filter: Click the FilterFilter icon icon and choose whether to filter by All Feedback or My Feedback.
      • View: To view all replies for a particular feedback thread, click the Show all replies (X) link, where X indicates the number of replies in that feedback thread.
      • Reply: To reply to a piece of feedback, click the Reply button, enter your feedback and click Send. If you do not wish to receive notification emails for this feedback thread, select the Do not send me a notification email checkbox.
      • Add: To add new feedback, click +. The "Send Feedback" dialog will appear. Select the feedback Type (Comment, Problem, Question, Suggestion) from the Type drop-down menu. Once a feedback thread is created, the type cannot be changed. Enter the feedback Title and Comments and click Send. If you do not wish to receive notification emails for this feedback thread, select the Do not send me a notification email checkbox.
      • Note: To add attachments to your content feedback, navigate to the Library and upload the attachments there. For more information, see Feedback.

        Note: The "Use Product Feedback" User / Role permission allows users that are content consumers to submit Feedback on library content.

Updating the Qvidian for Web Settings

  1. Click the Menu Menu icon icon.
  2. Select Settings from the dropdown menu.
  3. Specify your Subscriber GUID if you are using SSO. Your Subscriber ID, which is entered into your Subscriber GUID field, can be found in the "About" area within the header of the Qvidian interface.
  4. Select the Disable SSO authentication checkbox to turn off SSO and use an explicit login.
  5. Select the Turn on debugging mode checkbox to enable the debugging window. This setting is only used when you need to provide customer support with more information regarding an issue that you are experiencing.
  6. Click Save.

Logging out of Qvidian for Web

  1. Click the Menu Menu icon icon.
  2. Select Logout from the dropdown menu.